

specmax-cnc-online-store
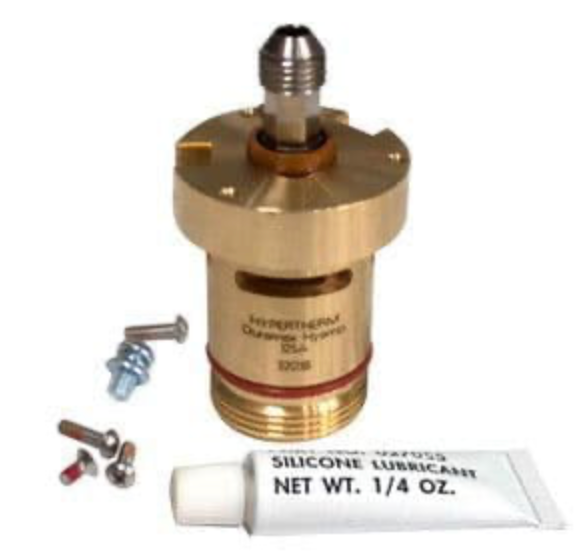
Hypertherm Duramax Machine Torch main body 228716
Hypertherm Duramax Machine Torch main body 228716
Couldn't load pickup availability
This is a genuine Hypertherm 228716 plasma cutting torch body for Duramax mechanised cutting torches. This torch would have been fitted to the Hypertherm Powermax 65, 85 and 105 and used with a CNC plasma cutting table.
Over time the threads on the torch body can become worn, which in turn does not allow the back cap that holds all the consumables in place is not able to be tightened properly. If the back cap is not tight the micro switch is not actuated which gives Hypertherm error code 0-50.
Changing the torch body is not too difficult, just follow the procedure below below, however we would advise to replace the mounting sleeve part number 228735 while stripping the torch down. The mounting sleeve can become very brittle over time and can easily break when being handled, see related products below.

Remove the torch body
1. Turn OFF the power and disconnect the torch lead from the power supply.
2. Remove the consumables from the torch.
3. If applicable, unscrew the strain relief body from the strain relief nut and slide the strain relief body back along the torch lead. (Part 8)
4. If applicable, unscrew the strain relief nut from the positioning sleeve and slide the nut back along the torch lead.
5. Unscrew the positioning sleeve (Part 2) and coupler (Full-length machine torch) or coupler (Mini-machine torch) from the mounting sleeve.
6. Remove the three screws from the consumables end of the mounting sleeve using a #1 Phillips screwdriver and slide the mounting sleeve off the front of the torch body.
7. Disconnect the wire connector for the cap sensor micro switch (part1a).
8. Remove the cap sensor switch using a #1 Phillips screwdriver to remove the mounting screw. Set the screw and switch aside.
9. Remove the screw that secures the torch’s pilot arc wire to the torch body using a #1 Phillips screwdriver.
10. Loosen the nut that secures the gas supply line to the torch body using the 1/4-inch and 3/8-inch wrenches together (or two adjustable wrenches).
Discard the old torch body.
Install the new torch body
1. Tighten the nut that secures the gas supply line to the torch body using the 1/4-inch and 3/8-inch wrenches together (or two adjustable wrenches).
2. Tighten the screw that secures the torch’s pilot wire to the torch body using a #1 Phillips screwdriver.
3. Install the cap sensor switch using a #1 Phillips screwdriver to tighten the mounting screw.
4. Connect the wire connector for the cap sensor switch.
5. Slide the mounting sleeve over the front of the torch body, aligning the slot in the mounting sleeve with the cap sensor plunger.
6. Tighten the three mounting sleeve screws using a #1 Phillips screwdriver.
7. Thread the coupler (Mini-machine torch) or coupler and positioning sleeve (Full-length machine torch) into the mounting sleeve until hand tight.
8. If applicable, thread the strain relief nut into the coupler (Mini-machine torch) or positioning sleeve (Full-length machine torch) until hand tight.
9. If applicable, thread the strain relief body onto the strain relief nut until hand tight.
10. Replace the consumables and reconnect the torch lead to the power supply.
Materials
Materials
Shipping & Returns
Shipping & Returns
Dimensions
Dimensions
Care Instructions
Care Instructions
-
Free Shipping
Pair text with an image to focus on your chosen product, collection, or blog post. Add details on availability, style, or even provide a review.
-
Hassle-Free Exchanges
Pair text with an image to focus on your chosen product, collection, or blog post. Add details on availability, style, or even provide a review.